Openoffice.org 3.3 final is released. although their market has been taken by LibreOffice OpenOffice didn't stop to work and release it's new version, their official website claimed that OpenOffice 3.3 has been packed with handy new features that make the suite significantly more comfortable to use. you can try it's and install trough apt-get or other package installer.
Install OpenOffice 3.3 from PPA (Via apt-get install or Synaptics Package Manager)
if you are using ubuntu (debian based) linux distro, follow the instruction bellow to install OpenOffice 3.3 via apt-get install.
Add OpenOffice 3.3 PPA repository top your package database
sudo add-apt-repository ppa:openoffice-pkgs/ppa
Get update your package repository info by this command
sudo apt-get update
Install OpenOffice 3.3 via apt-get install through this command :
Firefox still the best browser ever, at the moment after i had install firefox 4 in my laptop i felt there was a little bit change in firefox, not because their new interfece but I feel this browser walk slowly than it's previous, Is your Firefox 4 walk Slowly?, Find Out why it's happen..
Regarding to the mozilla firefox official website, Some add-ons may even slow Firefox to a crawl and make it difficult to use for regular web browsing, for best performance you should disable add-ons that you no longer use regularly. When i checked at my firefox evidently i have activated one of most influential add-ons which have most impact on how long it takes Firefox to start up. Check the list below, maybe one of them installed on your firefox 4.
Top 10 Most Slowing Performance add-ons
To get the complate list of Most Slowing Performance add-ons, you can go to this link. If you find some add-ons above installed on your pc/laptop you should consider to delete them unless that add-ons is very important to you. Besides of avoiding some add-ons above we have small tips which can improve your firefox performance. Launch your Firefox 4 and in the address field, type about:config and hit ENTER. Now it will show you a warning message, click on the button labelled as I’’l be careful, I promise. You will face with Mozila Firefox Config page, you need to change some parameter to get your firefox running fast, find some parameter below and change it according to the example below:
Last tips, try to use ads blocking add-on to reduce heavy workload on Firefox 4, to much ads will slow down your firefox 4 performance. There are many Firefox 4 addons available on Internet which would help you block ads. hope that this will surely increase the speed of Firefox 4.
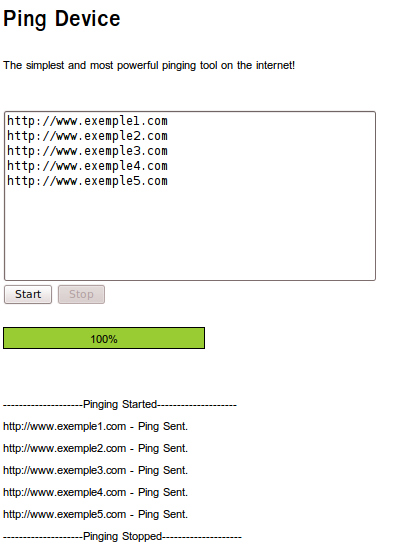
Blog pinger, i thing all blogger know it. Blog pinger or Pinger tool is such application made to help poeple notify search enggine that her/his blog has been updated. ping is an XML-RPC-based push mechanism by which a weblog notifies a server that its content has been updated, i dont know how it's work exactly but some issues that I believe using ping tools can help you to make your blog have a good visibility in search engine. Here is 2 of most powerfull ping tools (in my opinion) which referenced by my friend that i usually use to ping some of my blog
Ping device have a simple view, but trust me it's give you advantages more than it's looks. ping device can perform mass ping and give simple report how far the system has worked, just fill the url in the text area then click start.
Same as tool above, using ping farm you can not only perform mass ping as usual but also perform blog pinging through RSS URL.
pingfarm.com screenshoot
there are many website that offer blog ping service with farious function and advantages, do not get confused which is best don't lose focus cause your content is everything.
Problems that usually occur is system (network manager) can't browse available access point, regarding to this problem you can solve by adding wireless connection manually using the correct access point name and wireless security key. Other way, you can search access point trough terminal using iwconfig or iwlist, see the exemple bellow.
$ iwconfig eth1
the result should be like this
eth1 IEEE 802.11g ESSID:"OSU_PUB" Mode:Managed Frequency:2.427 GHz Access Point: 00:0D:9D:C6:38:2D Bit Rate=48 Mb/s Tx-Power=20 dBm Sensitivity=8/0 Retry limit:7 RTS thr:off Fragment thr:off Power Management:off Link Quality=91/100 Signal level=-39 dBm Noise level=-87 dBm Rx invalid nwid:0 Rx invalid crypt:860 Rx invalid frag:0 Tx excessive retries:0 Invalid misc:39 Missed beacon:8
the bold line above (OSU_PUB) is exactly the name of access point, complate guide how to add wireless access point by manual through terminal can be complately find in here.
Compaq Presario CQ62 No Sound
The common problem is laptop no sound or if the speakers are not working but the headphones are, you can follow the instruction bellow, do with command line :
Some of compaq presario have experience with this problem, foremost laptops that running Ubuntu under 10.10 (Maverick Meerkat), we got a lot of answers in a forum but sometime not work properly. the main problem is the GNOME itself, you can fix it by re-installing GNOME or try to install new version of your distro (Ubuntu 11.04 maybe), other way we have tricky solution that usually work, do with command line under #root.
echo -n 50 > /proc/acpi/video/VGA/LCD/brightness
50 is percentage of brightness, you can replace the 50 with: 37 12 25 37 50 62 75 87 or 100. After doing some action above, don't forget to reboot your laptop and your problems should be solved after that (i hope so).
Hii.. desktop holic, I think we have good stuff for you. Icon is an important part of a theme whichcanprovideconvenienceat once enhance your desktop appearance. Faenza Gnome icon theme is one of alternative which can be used to enhance your desktop appearance, here is a screenshoot of their icon pack.
Faenza 0.9 Gnome Icon Pack
You can install Frenza Gnome icon pack through apt-get or Synaptics package manager, copy - paste the code bellow to your terminal.
"What is GNOME ?" I think each Linux user should know it ! GNOME is Desktop enviroment that runs on top of a computer operating system. GNOME is a part of the GNU Project and can be used with various Unix-like operating systems, especially for Ubuntu it self. Taken from the official website, Gnome will released the new version of Gnome 3 on Tuesday 5 April 2011. Find out what's new stuff you can find in Gnome 3 here ..
Modern, Clear and Beautifull
I'm sure everyone agree with this statement, GNOME 3 looks Modern, Clear and Beautifully than previous version although some cool effect (mostly desktop eye candy) are left behind permanently. you do not need to worry because GNOME 3 has provide the Mutter Window Manager instead of Compiz, to provide style and some animation effects. Compiz is a compositing manager that can also be a window manager but not active by default.
Gnome 3 Shell Screenshot
Built-in Messenger widget
Especially for chatting lovers GNOME 3 bring a good stuff for you, relize that communication is an important part of the modern desktop, GNOME 3 bring this function which let you to continue the conversations without changing focus.
Gnome 3 Messenger Widget Screenshot
All in one MenuPanel
The GNOME 3 make a totally change in the part of menu panel, GNOME 3 Panel give a new way to start an Application, search a file and browse some system settings, this new interface make quick and straight forward to find the setting that you want.
Gnome 3 Panel Screenshoot
There area lot ofchanges we met in GNOME 3 like a redesigned file manager, redesigned workspaces, and many more. Try it free and feel the new atmosphere of GNOME 3.
How to install GNOME 3 Shell at Ubuntu 10.10
For ubuntu 10.10 (Maverick) user you can test by your self, follow step by step the instruction bellow :
1. Get the Repository then Install it!
sudo deb http://ppa.launchpad.net/ricotz/staging/ubuntu maverick main
sudo apt-get update
sudo apt-get install gnome-shell
2. you can try to using gnome-shell, and replace your current GNOME Desktop Enviroment
gnome-shell --replace
3. If gnome-shell works well in your desktop, you can have it started up by default by changing the /desktop/gnome/session/required_components/windowmanager key from metacity to gnome-shell with gconf-editor.
ER Diagram is an abstract and conceptual representation of data. Entity-relationship modeling is a database modeling method, used to produce a type of conceptual schema or semantic data model of a system, often a relational database, and its requirements in a top-down fashion. Diagrams created by this process are called entity-relationship diagrams, ER diagrams, or ERDs (wikipedia). How to Draw ER Diagrams is quiet simple, when I was surfing on youtube I found this great tutorial, watch carefully video tutorial bellow "How to Draw an ER Diagram with DIA" .
Besidesof Drawing ER Diagram, you candofollowing action with DIA :
A ‘QR’ (short for Quick Response) code is a so-called ‘two-dimensional barcode’ made up from black squares on a white background. QR Codes are usually contains URLs, Text or something like ID of Product, the QR Code technology is widely use in Android and Blackberry mobile phone, if you are Blackberry or Android user i think you must be familliar with this. The image bellow is some example of QR Code.
The QR Codes
There are many resources which can help you to generate a QR Code, in Ubuntu you can use application called 'qrencode', the qrencode could help you to generate your own QR Code complete with what size do you like (Large, Medium, or Small), a manual how to use a qrencode can completely find in here. Anoher way, you can visit this website (http://qrcode.kaywa.com/) to generate your own QR Code.
This article will discuss how to read a QR Code in Ubuntu, to read a QR Code in ubuntu we need library (program) named libdecodeqr-simpletest - libdecodeqr library's simple test program, this sample program can recognize the image file of the QR code of JIS X 0510 and ISO/IEC18004. Before we start, you should Install libdecodeqr-examples using apt-get or Synaptics Package Manager.
apt-get install libdecodeqr-examples
libdecodeqr-simpletest is command based application program which is accessible through ubuntu terminal, all command and output of this application is displayed through the screen of terminal, use libdecodeqr-simpletest by using structure above :
libdecodeqr-simpletest <the path of QR Code image>
For more detail see the example bellow (you must have QR Codes to be testing if you don't have any please download here) :
libdecodeqr-simpletest /home/white/qrcode.png
the line command above is illustrated of 'reading the QR Code on the image of qrcode.png', the command above will give output on the terminal like this :
Who do not know a Skype, the software which usually help people to make a calls over the Internet using computer. Skype uses decentralized peer-to-peer technologies, so your calls do not go through a central server but through distributed servers and other users. It uses its own proprietary communication protocol to achieve this. How to install skype on Ubuntu 10.10 is quite simple, follow this guide bellow to install skype on Ubuntu 10.10.
First you need to add Ubuntu 10.10 skype repository to your Aptitude, add following line to your source.list (/etc/apt/source.list) then save.
deb http://download.skype.com/linux/repos/debian/ stable non-free
For the second step, you need to install PGP key, paste and execute the command bellow to your terminal.
Firefox 4 (stable) has launched, this superb web browser come with the tagline "Made to Make the web a better Place" propose three major advantages that is Personalize, Go Fast, and Stay Safe. Especially for ubuntu user, you can install Firefox 4 by downloading the installation packagehere, or you can install it using apt-get or synaptics package manager. If you have decide to install Firefox 4 via apt-get or synaptics you can following 3 step to install Firefox 4 via apt-get or Synaptic on ubuntu bellow.
First, before you start the installation, add the Firefox 4 Ubuntu PPA Repository to your /etc/apt/source.list. If you have dificulty to find that file, just copy and paste the command bellow to your terminal.
Second, update your package repository info by this command.
sudo apt-get update
For the last, install the Firefox 4 through apt-get using the command line bellow, or using Synaptics Package Manager by search key : "Firefox 4".
sudo apt-get install firefox ubufox
Firefox has always good, Ineverfeltdisappointed while using this web browser, to get more information and screenshoot about the new Mozilla Firefox 4 you can visit the official website here.
"Are you pidgin user ?", we have a tips for you ...
There is a security issue regarding passwords storing in pidgin, you should have to think back when using automatic login through "remember password" on this application. Why? Because pidgin will store your account password in plain text it's mean that pidgin save your password in clear text without any encryption. If you are using ubuntu or other distro the account settings stored in /home/<user>/.purple/accounts.xml. and for windows user the file will strored in C:\Documents and Settings\user\Application Data\.purple\accounts.xml.
Pidgin save password screenshoot
If you enable remember password, you will find tags <password> in that file (accounts.xml) then followed by your account password. And yes, "naked" just like that..
Pidgin password stored in accounts.xml
There's still vulnerabilities regarding passwords storing in pidgin, our suggestion is don't activate automatic login using "remember password" while using pidgin, cause you have been stripped..
Draftsight is Professionals 2D CAD application which run in Linux (Ubuntu, Fedora, openSUSE) or other OpenSource software platform. As we know, we never had software (in Linux) which can Create, Open and View AutoCAD (*.dwg) before, but try this, this is an answer for engginering who appreciate of using OpenSource software or run all kind of Linux Operating system in their desktop. DraftSight professionals 2D CAD released beta version for linux lovers around the world as an alternative of AutoCAD. With this application we can also allows to create, open, and view *.dwg files. that produced by Autodesk the software company.
Draftsight running on Ubuntu
Try DraftSight professionals 2D CAD for Ubuntu by download the package from link bellow :
Draftsight for 64-bit users : The beta version of DraftSight is provided in 32-bit Operating System. To get DraftSight run on 64-bit Operating System (Ubuntu and all kind of linux) you need to install following missing library:
if you have installed all required libraries above, install the draftsight deb package through the terminal using 'force architecture' option, copy and paste the command above to install draftsight for 64-Bit Operating System :
Hi there, today we (ubuntubuzz) wanna share an excellent premium theme for your wordpress blog. This theme is specifically made by ubuntubuzz team which modified from default wordpress theme 'jenny'. This Green, Simple and Elegant Theme is suitableforyour blog which usually using a clean and simple themes view, This themes named 'Green theme' which is taken from our favorite color Green, here'sthe screenshot from the demo page.
Green wordpress themes
The Green Theme has a lot of option provided, you can customize and add some social information there, thus template properties provided :
Customable Widget in the left and bottom of page.
Dynamic featured image slider.
Featured video dan popular post (*controlable by theme option on the admin page).
Google adsense ready, you can embed adsense advertisment on the top and bottom of the post.
Easy to Insert google analytics code.
Social network and bookmarking sharing botton in the bottom of the post.
etc
The picture above illustrated 'the Green Theme' theme option on the admin page, you can find easily this page at the time you finish the installation.
Green wordpress themes admin
Finally you can test by your self, give us feedback so that we can provide a better wordpress template another day.
Perhaps many of Gamers wondered in their thought, "if we migrate to ubuntu, can we play popular games like we used to play before ?", for that question above I can answer clearly that Anything can do with Ubuntu Now days, this article will give another solution for playing popular Game at Ubuntu. The gamers used to play various game in different way, platform and operating system but in this article we just discuss how play a game console in ubuntu using application/system called emulator, a video game console emulator is a program that allows a computer or modern console (cross-console emulation) to emulate a different video game console's behavior. We have known that Ubuntu has a lot of video game emulator, in this article I just pick up top 5 Greatest Ubuntu Game Console Emulator you should know.
PCSX for Sony Playstation 1 (PS 1)
PCSX is Ubuntu Game Console Emulator for Sony Playstation 1 (PS1). If you are Sony PlayStation 1 (PS1) game fans, but you do not have the console, this is a solution for Playing Sony Playstation 1 (PS1) at Ubuntu. How to install PCSX in ubuntu is quiet simple, type the command bellow in your terminal then you have PCSX installed in your mechines
sudo apt-get install pcsx
PCSX2 for Sony Playstation 2 (PS2)
PCSX2 is Ubuntu Game Console Emulator for Sony Playstation 2 (PS2), PCSX2 available in both Microsoft Windows and Linux operating systems. In its latest stable release, many PS2 games are playable, and several games have full functionality. The main bottleneck in PS2 emulation is emulating the multi-core PS2 on a PC x86 architecture. Although each CPU can be emulated well, accurately synchronizing the cores is very difficult. How to use and install PCSX2 in ubuntu is quiet simple, download the libraryherethen running the PS2 game by using image.
The visualboyadvance (VBA) for Game Boy Advance
VisualBoyAdvance (VBA) is an Ubuntu Game Console Emulator for Nintendo’s Game Boy, Color and Advance, handheld game consoles. VBA now has versions for Windows, Linux and Mac.
How to install visualboyadvance in ubuntu is quiet simple, type the command bellow in your terminal, then you will have visualboyadvance installed in your Ubuntu.
sudo apt-get install visualboyadvance
Desmume for Nintendo DS (NDS)
Desmume is Ubuntu Game Console Emulator for Nintendo DS (NDS), DeSmuME is a new Nintendo DS emulator by YopYop. Emulates pretty well Meteos's demo but there is a small problem with the mouse. It is called DeSmuME which we guess comes from merging DS EMU and ME. Emulator is progressing very fast and many commercial NDS roms can be booted on it (http://www.ndsemulator.com/nintendo-ds/desmume.htm), Other Great Nintedo DS Emulator is nocash GBA, but we should have wine installed to run it, becauseGBA is not available in both Ubuntu and other Linux distros.
Desmume Nintendo DS screenshot
How to run or install Desmume in ubuntu is quiet simple (just like before :P), download the library here http://www.desmume.com/download.htm or by typing command bellow, then you will get desmume installed in your Ubuntu.
sudo apt-get install desmume
The Guide bellow is show us how to install and run Desmume on Ubuntu Desktop, the video bellow is taken from youtube by this link.
How to install and Play Nintendo DS using Desmume on Ubuntu Desktop
ZSNES for Super Nintendo
ZSNES is a Super Nintendo emulator ZSNES project was GPL'ed and its source released to the public. It currently runs on Windows, Linux, FreeBSD, and DOS. Remember that this is a public beta so don't expect this to run on your machine. How to install Zsnes in ubuntu is quiet simple an cheap, just type the command bellow in your terminal then you get znes installed in your ubuntu.
sudo apt-get install zsnes
Yes here the end of the article 5 Greatest Ubuntu Game Console Emulator, Another solution for Playing Popular Game at Ubuntu, hopefully this article would be useful for ubuntu gamers, happy holiday ....
Sometimes an IT Administrator need to work anytime and averywhere to manage or control computer devices or servers that exist by remote desktop sharing. Especially if there are disturbances and the position we're not at the office, while the device is experiencing problems can only be accessed by the office's internal network only, it required a VPN (Virtual Private Network) so that we can get into the office's internal network via a network connection from anywhere, VPN is Another Solution for Linux Administrator.
VPN solutions are now widely available, either provided by your ISP or a software. In tis article i want to review ubuntu remote desktop sharing using by software called "TeamViewer", Teamviewer is work using VPN Connection and can be use cross platform or cross operating system. Teamviewer software is available for windows and linux, to install Teamviewer in ubuntu you can visit their official website and download it here: http://www.teamviewer.com/download/index.aspx. This software is free as long as not used for commercial purposes. TeamViewer also provides a paid version of the course with more features than the free version. Teamviewer works by creating a pear-to-pear between 2 pieces of host or client, Install Teamviewer on the computer within the internal network that we want the remote, then other computer that will perform remote must have internet connection and off course Teamviewer ready. look following exampletoperform ubuntu remote desktop sharing using Teamviewer VPN. I'm using Linux Ubuntu 10.10 and I am going to a remote target is a PC with Windows OS. How to install Teamviewer in ubuntu is just type command above in the terminal:
$ Sudo-i teamviewer_linux.deb dkpg
Once completed in our live install just run from the menu in Ubuntu: Application - Internet - TeamViewer
Teamviewer screenshot
Each TeamViewer will have a unique fixed ID for every 1 computer. and will also generate a password each time you run the software. Well next, make the TeamViewer remote ID on your computer that will be remote. Live input only opponent ID and password then click "connect to a partner"
Teamviewer remote desktop sharing
In terms of security this software is somewhat vulnerable because of its simplicity to use. If we do not want to allow this software running on the internal network, maybe you can block the port and its domain from the side of the firewall. Yep .. That is Another Solution for Linux Administrator who want to perform remote desktop sharing using VPN, i hope this will help .. :D
0
comments
Hi there..Since a long time not uptodate. Here we are to bring technical guide "How to make your Linux Gnome (Ubuntu) desktop look like a Mac, this guide is for Ubuntu addict with obsessed with the theme of Mac OSX esspecially the Leopard. Previously we know themes like Mac4Lin, and now we can use this themes (GEKOS Leopard Theme for Nautilus Elementary) to make our desktop look like a MacOS Leopard closely, out of my personal opinion, this themes is great than Mac4lin it self. GEKOS Leopard Theme for Nautilus Elementary can be downloaded from this link: http://gekos.no/themes/gtk.html, From the screenshot attached, I think this theme is the closest to the actual theme of Mac OSX.
gekos showing image file screenshot
gekos desktop screenshot
And this is GEKOS Leopard Theme for Nautilus Elementary User Review Video i grab from youtube.
Yes enough for today, i hope my tutorial would make you pround of you linux (ubuntu) desktop now, for full review and screenshoot you can follow this link.