SUSE Studio is a free online Linux image creation service sponsored by
Novell Inc. The company behind SUSE Enterprise Linux and Open SUSE Linux. With SUSE Studio you can develop your own SUSE based Linux OS,
software appliance or
virtual appliance, choosing which applications and packages they want on their "custom" Linux and create their own branding for it.
You can also choose between openSUSE, SUSE Linux Enterprise Server and SUSE Linux Enterprise Desktop bases for your custom builds, can choose GNOME, KDE and other desktop environments, The resulting build will be fully functional system with applications like Firefox, LibreOffice, and whatever apps they want.
Getting StartedNote: New and inexperienced users are advised to create their first custom build from the templates in SUSE gallery to avoid build problems due to dependency issues with selected packages. Below tutorial would be useful for both advance and new users to get started. Please also note that this article illustrates only essential steps required to create a custom build Linux and not all the aspects of SUSE Studio are covered in this tutorial.
Using SUSE Studio is very easy, what you need is just a browser and an Internet connection, you don't need to install any application on your system to create ISO files for your brand of custom Linux. Here is a short guide to get you started with SUSE Studio.
Open the website
susestudio.com , it will open a welcome page, click on
"sign in or create an account" you will be asked to login through your Novell, Google, Yahoo, Facebook, Twitter or Open ID accounts. If you don't have a Novell account Just choose any of the accounts such as google or facebook.
Just fill in your details and press
"continue" to get started, you are now ready to start your own custom Linux distro.
Click on
create you new appliance to start a new Project.
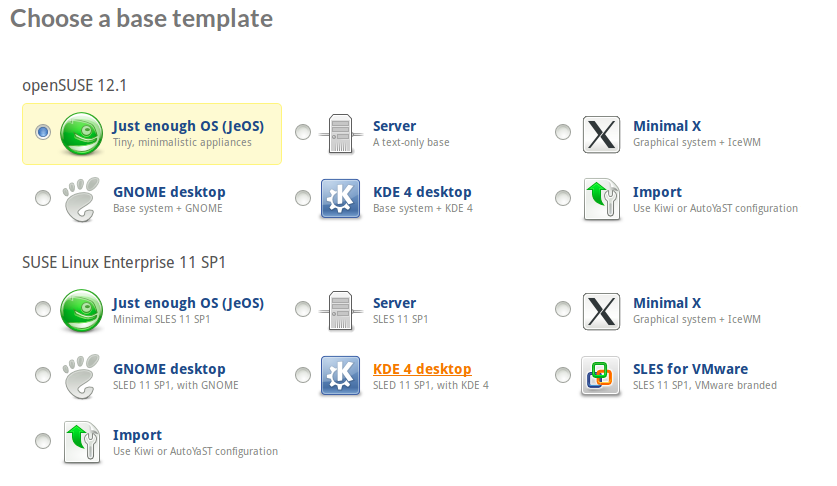
Choose a Template for your custom build, Choose the hardware architecture (32bit or 64bit) and give your Project a name, with which your custom build will be known to everybody,
Now you are ready to customize, rebrand and configure your new project,
Click on the
software tab to select the packages and applications to be included in your custom build, you can add applications through repositories, upload your own RPM files , or even make a simple search in the SUSE repositories for the applications of your choice.
After choosing the applications, click on
configuration tab, here you can customize Language, keyboard layout, time zone, network, firewall and user settings etc,. You can also personalize your custom build with your own logo and welcome screen background, select a default run level, add your own EULA (end user license agreement) add a custom script at boot time etc.
Now you are ready to build your first custom Linux or Software Appliance using SUSE Studio.
You can choose to create either a USB stick/hard disk image, Live CD/DVD, VMware/Virtual box, OVF virtual machine, hyper-v or Amazon EC2 image formats for your custom Linux/Appliance. Your Build may take some time depending on number of packages and will report any dependency issue or conflicts for any unmet dependencies at this step after you hit the Build button.
You can now either download the generated ISO image, or upload to Amazon EC2 and start using your own brand of Linux Desktop.